How to automatically detect data changes for your Shiny Calendar app (ft: Jira, pins, Posit Connect)
videoimage: thumbnail.jpg
Transcript#
This transcript was generated automatically and may contain errors.
Hi everyone, my name is Isabella Velasquez and welcome to the end-to-end workflow with Positeam. Let's say you have a dataset that's updated regularly. You created an awesome Shiny app for it, and you want your app to pull in the most up-to-date data without constantly reloading it unless it has changed. Today, we'll explore one workflow option using Positeam and Pins.
Pins provide a straightforward way to store and share datasets as files. They are ideal for lightweight use cases where you don't need the overhead of a full relational or NoSQL database. You can save objects like data frames, models, and plots, and load them easily using PinRead or PinReactiveRead, making the process less complex for small to medium-sized projects. They are well-supported in Shiny applications, making it easy to work with pinned data reactively. So, you can pull and refresh data as needed with minimal code changes.
Today, you'll see how to simplify your process for keeping dynamic data current, and how to reflect those changes in your app or dashboard. With that, let's get started.
Project overview and key tools
So, let's talk about some key tools and concepts for today. Today's project is a Shiny app that I built to streamline our marketing content calendar. I rely on Jira for managing deadlines, but its interface isn't the easiest for quickly scanning dates across categories. With Shiny, I could create a responsive and user-friendly interface that makes it easier to track, filter, and visualize the schedule. And through the use of the tools we'll talk about today, I know it's always showing the most updated Jira data.
To run this workflow, we start by retrieving the desired Jira data through its API. Using Posit Workbench, we create a document called data-pull.qmd to pull and clean the data. Next, we connect to our Posit Connect pin board and write the clean data to a pin. This process can be scheduled to run automatically. Then, we develop our Shiny app in app.R, also within Posit Workbench, and deploy it to Posit Connect. By using pin read-reactive, the Shiny app will automatically update whenever the text changes in the pin on Posit Connect.
I used a Quarto document to pull data because it allows combining both Python and R chunks. However, this process could be handled with just a script. First, we write code to request data from the API, converting it into a usable format like a data frame. After that, we clean the raw data for analysis.
But given that Jira data constantly updates, the challenge is creating a clean dataset that's easy to access and keeps up with changes. So how can we do this?
Using pins to store and refresh data
Enter pins. Pins enables you to store and retrieve the processed data. In the data-pull.qmd file, we include the script to connect to our board, in this case Posit Connect, clean the data, and then write the clean data into a pin. The pin is stored on our board and can be easily referenced in scripts or Shiny apps for data access and use.
So in this case, in the data-pull.qmd file, we have in a code chunk the connection to the board. After that, we can pull the data and clean it as needed. Then finally, we write the pin to our board using pin write. And wherever we want to access it, then we would use pin read in that script or that app.
And so to keep that pin up to date, we can schedule automatically refreshes of the pin with Posit Connect. So here I go into the settings, go to schedule, and then select the options that I want for rerunning the output. That way, I make sure anytime the pin is accessed, it's always using the most up-to-date data since the last refresh.
Shiny and reactivity
So we've talked about various different outputs that you could put in Connect. So pins and another is Shiny. So what exactly is Shiny? Shiny is a framework for creating web applications using R or Python. And the web apps respond to user inputs and data changes in real time. So you can change your analyses into interactive applications.
Its power lies in reactivity, where outputs instantly update whenever inputs or underlying data change. This allows the app to stay responsive and interactive without needing manual refreshes, making it perfect for real-time data exploration.
Its power lies in reactivity, where outputs instantly update whenever inputs or underlying data change. This allows the app to stay responsive and interactive without needing manual refreshes, making it perfect for real-time data exploration.
So how exactly can we do this in Shiny with data? We can use pin reactive read from the pins package. Using pin reactive read in our Shiny app enables real-time access to the pin data. This function automatically updates the app whenever the pin is refreshed, ensuring that the app stays responsive and always uses the latest data available.
Demo: the Jira board and Posit Team
So let's see it in action. This is my Jira board. It contains the data that I want to recreate in my Shiny app. So you can see there are a variety of tasks such as blog posts and social posts. I have them categorized into different topics like tidy models and Shiny. If I click into one, you can actually see the due date. So that's what I want to represent on my calendar. And of course, I want my calendar to reflect whatever information is on this board at any point in time so that I can make sure that it is up to date.
So to do that, let's go into Posit Team. This is our home page. Posit Team is made up of three products. Posit Workbench for development. Posit Package Manager for exactly that, managing packages. And Posit Connect for deploying and publishing apps, documents, pins, all sorts of data outputs. Since we want to develop something, we're going to enter Posit Workbench. From here, we're going to create a new session for RStudio Pro.
As you can see, Posit Workbench offers a bunch of other different configuration options like connecting to Databricks or Snowflake, different images and resources. But this is good for now. I'm going to start the session and it will automatically let me in once it's ready.
Walking through the data-pull Quarto document
So my project is in the Shiny Calendar folder. I'm going to open it up.
Here are the files I need to create my calendar. And so, first, here's the data-pull.Quarto document. As mentioned earlier, I chose the Quarto document so I can mix R and Python code chunks. However, that's not necessary. As you can imagine, Quarto can run in either language or you could also do this process through an R or Python script. But this is how I like to do it based on my own personal preference.
To walk through it, first code chunk is the setup code chunk where I list all the R packages that I'm going to use. And then I have the Jira API key, which actually lets me access data from my Jira board and pull it into Posit Workbench. And then I'm also going to configure my pin board, in this case, Posit Connect, by specifying the Posit Connect server that I'm going to use and providing the API key since Posit Connect is a secure server.
Next, I have my Python chunk. So again, there's no real reason for this other than my own preference. When I first wrote this function out, I wrote it in Python and I didn't want to translate it into R, but it's absolutely possible to do so. And so one neat thing about using both R and Python chunks, using the package reticulate, I can actually call objects from across different programming languages within the same document.
So if you recall earlier, I noted the Jira API key that I needed to actually use to access the API. And here in this Python chunk, I'm referring to it by specifying R.API key. So what that's saying is look at the R environment and pull the API key. Next, I have the two URLs that I'm going to be using for pulling the data. So there are probably many different ways of doing this, but in this example, I just have two separate URLs, one for the social post and one for the blog post, and I'll run the same functions of both.
Next is the function for getting the response from the URL. So pulling in that data and which results in a JSON file. And for the social post and the blog post, they're going to be saved in these objects called social results and blog results in the Python environment. However, R is my language of choice, and so I'd like to port this back into R and work with it from there.
So back in an R chunk, I create another function called results, which takes that data from the response in the Python chunk as a category and then does a series of data cleaning steps. So first thing it does is it transports it into a table so I can run my usual R operations on it. I do things like add the due date for that particular task and convert it into an actual date with LuverDate. I add a column for status, a column for the different labels, and then another column for the URL for that particular task so I can refer to it on the actual board if I so choose. And then use dplyr's bind columns in order to bring all of those different pieces of information together. And then I run that function on both the social results and the blog results.
And again, I am referring to something from a Python chunk by using py and dollar sign, and then also adding the name of the category, either social or blog, next to it. And finally, I have another code chunk that goes through, binds those two tables together, and then creates a series of columns that I'm going to need for creating the calendar.
So the calendar in Shiny is going to be created using a really awesome package called Toast UI, which has a variety of widgets, including a calendar one. And the data needs to be configured in a certain way in order for it to look the way that you would like. So things like adding colors to the different labels and things like that. You could do that in the data frame and then Toast UI's calendar will be able to read into it.
But now that I have this all results table that has all of my API data that I want to showcase cleaned up and associated with different requirements for the calendar, now I can actually write that clean data onto my Posit Connect board. So here I refer to the board from up above, I let it know which data it is that I want to pin, and then the name of the pin so that I can refer to it later.
And so if I render this, see what it looks like.
And it looks just like a regular rendered Quarto document. I didn't have any comments or markdown in it at all. But remember, every single time that this QMD file is run, the Jira data from the board is pulled, it's cleaned up and then written to that pin. So that means that pin will have the latest data as of the last time that this document was run.
Deploying to Posit Connect and scheduling
So what if I want the latest data without having to manually run this QMD file myself? And that's where we can deploy to Posit Connect. So there are a variety of ways of deploying to Posit Connect. You can do git-back deployment. So anytime it senses a change in a GitHub repository, it will re-render on Posit Connect. You could do it through the command line interface. But I'm going to show you how to do it through push button deployment.
So if I click this blue button, I have actually deployed this Quarto document before. So it automatically pulled in the information that it needs. So I'm going to hit publish. And down here, it's going to, as you can imagine, create the environment that it needs, re-render the Quarto document and everything in order to deploy it to Posit Connect.
So here's that same render file, but now it is on Posit Connect. So the key part here is the configuration options that Posit Connect allows you to have for your data content. So you can do things like allow sharing with other folks. You can add vanity URLs. And I can share this URL with other folks. And then most critically for today, I can schedule the output for refresh. And so that every time that the document is refreshed, that pin is overridden with the latest data and can be used in other places like a Shiny app.
And in terms of the configuration for the schedule, I can specify other time zones. I can say, let's do it at 6.55 in the morning rather than 7. Run every day, every two days, et cetera. So just once again, every single day at 6.55 in the morning, this document will be run, the pin will be rewritten, and it will have the latest data as of that time. And I could make it more often if I want to, but let's say I just look at the calendar once a day, so that's good enough for me.
Building the Shiny calendar app
So now that I have done this, now I want to actually use that pin for something. So let's return to Posit Workbench. And now I'm going to open up my app.r file. So app.r contains the Shiny app that builds the calendar using the data that we just pinned. We begin with the packages that we're going to need to actually build the Shiny app. And similarly, we're going to configure our board. So we're going to connect to our Posit Connect board with our Posit Connect API key. And then I'm going to specify the name of the pin that I want to use for this app.
Another package that I wanted to call out is BS Lib. So BS Lib offers extensive customization, layouts, theming for your Shiny apps. One example is the ability to pull in Google fonts very easily, as you can see here. Other things you can do is say I want a footer. I can specify what could be in the footer and then add it in to my actual app later on. Within the layout of BS Lib, I can specify the theme and customize how I want my app to look. So in this case, I'm saying I want the Cosmo boot swatch theme. I want a white background, this color foreground, this font, et cetera.
And then BS Lib allows you to customize layouts. So here, for example, I have specified that I want a sidebar with the title called filters. And then you may notice I have UI output filter UI, and I'm actually going to define this in the server. The reason for that is because I want my filters to be as updated with the data as I can. So if I add a new category or add a new status or something like that. And so I'm actually going to specify it later on when I have read the reactive data in. But I do want to specify that I want it up here in the UI.
Next, I add a header. And then finally, the card that actually contains the calendar that I want to see. And then finally, the footer that I created up above.
Now, here is the most critical part. We talked about reactivity earlier. So the server is where we actually build in reactivity for our Shiny app. And the key takeaway for today is this pin reactive read function from pins. And so what that does is it reads and gets the data reactively. And you can specify within pin reactive read how often you want it to check. But anytime it notices that your pin has different data than before, it will automatically update and reflect that in your Shiny app.
But anytime it notices that your pin has different data than before, it will automatically update and reflect that in your Shiny app.
Next, we have reactive values for storing filter data. We ensure that data is available and we store the filter data in a reactive values object. Next, we update filter choices based on the latest data. So, again, if I added a new category, I want to make sure that's reflected in the app itself. And then we dynamically render the filters based on the data. We set up the filters with the reactive data. And we update the filter data whenever the filters are applied.
And then we render the calendar with filter data. Next, there's a few things for the calendar itself. As you can imagine, Toast UI offers many configuration features for your calendar so that it looks exactly the way that you want. So there are things that I opted to change, like how the calendar item clicks and things like that, just based on my own personal preference. Another thing is that I wanted the custom pop-up to close whenever the close button is clicked as well. And as usual, our Shiny app ends with Shiny app UI server.
Running and deploying the app
So if I run this, we can see what the app looks like.
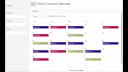
Fantastic. So here we can see the layout options that I mentioned earlier. Here's the header. Here is a footer. Sidebar with the different filters based on how I want to look at my calendar. The different configurations within Toast UI allow me to do something like this, like a pop-up, where if I click more info, it'll take me to the actual Jira board. And then different colors for the different topics, just to make it easier to track the data and see the distribution of my content over time.
So this is great. Now let's deploy this to Posit Connect. So this time I'm going to publish it to a Shiny calendar.
Live demo: updating Jira and seeing the change
So say somebody emails you, and it's like, oh, hey, actually, we need to add something for the fourth social post for the Tidyverse. So we can go back to our Jira board. And say we're going to create an issue. Social post, say eight. And then sign it to me and give it Tidyverse. And then put it on the fourth.
However, this hasn't updated in the Shiny content calendar. And the reason for this is the Shiny content calendar is looking at the pin, which hasn't been refreshed. And the reason for that is we scheduled it to run every day in the morning. It's in the afternoon now. But we can always, you know, change that schedule depending on what you need. But just to illustrate what it would look like, here is the data pull document. I can refresh.
So this Quarto document has been run. The pin has been written. And if I go back to my content calendar, I can see that new social post eight on my Shiny calendar without having to rerun the Shiny app.r file or do anything else. Because that pin reactive read function automatically detected that something had changed and populated it on my Shiny app.
Because that pin reactive read function automatically detected that something had changed and populated it on my Shiny app.
So I hope that this was a good overview of the possibilities with pin reactive read and Shiny. And just to showcase how pins, especially for small and medium-sized projects, can really enable you to create dynamic, up-to-date, Shiny apps for your stakeholders or for yourself. And I hope that this application was a clear demonstration of the possibilities. And I look forward to your questions.

